

When the new 2025 Ofsted Early Years Inspection Toolkit landed, many nursery leaders told me the same thing:
“I can see it’s thorough and well-intentioned – but where on earth do I start?”
The toolkit runs to 50+ pages. It is rich in detail. But on a Tuesday afternoon when you’ve just covered a room, dealt with a parent concern and you’re staring at a blinking cursor in a Word document, “rich in detail” can feel like “more pressure”.
What you need is not another explanation of the toolkit.
You need a simple, repeatable way to turn it into a plan.
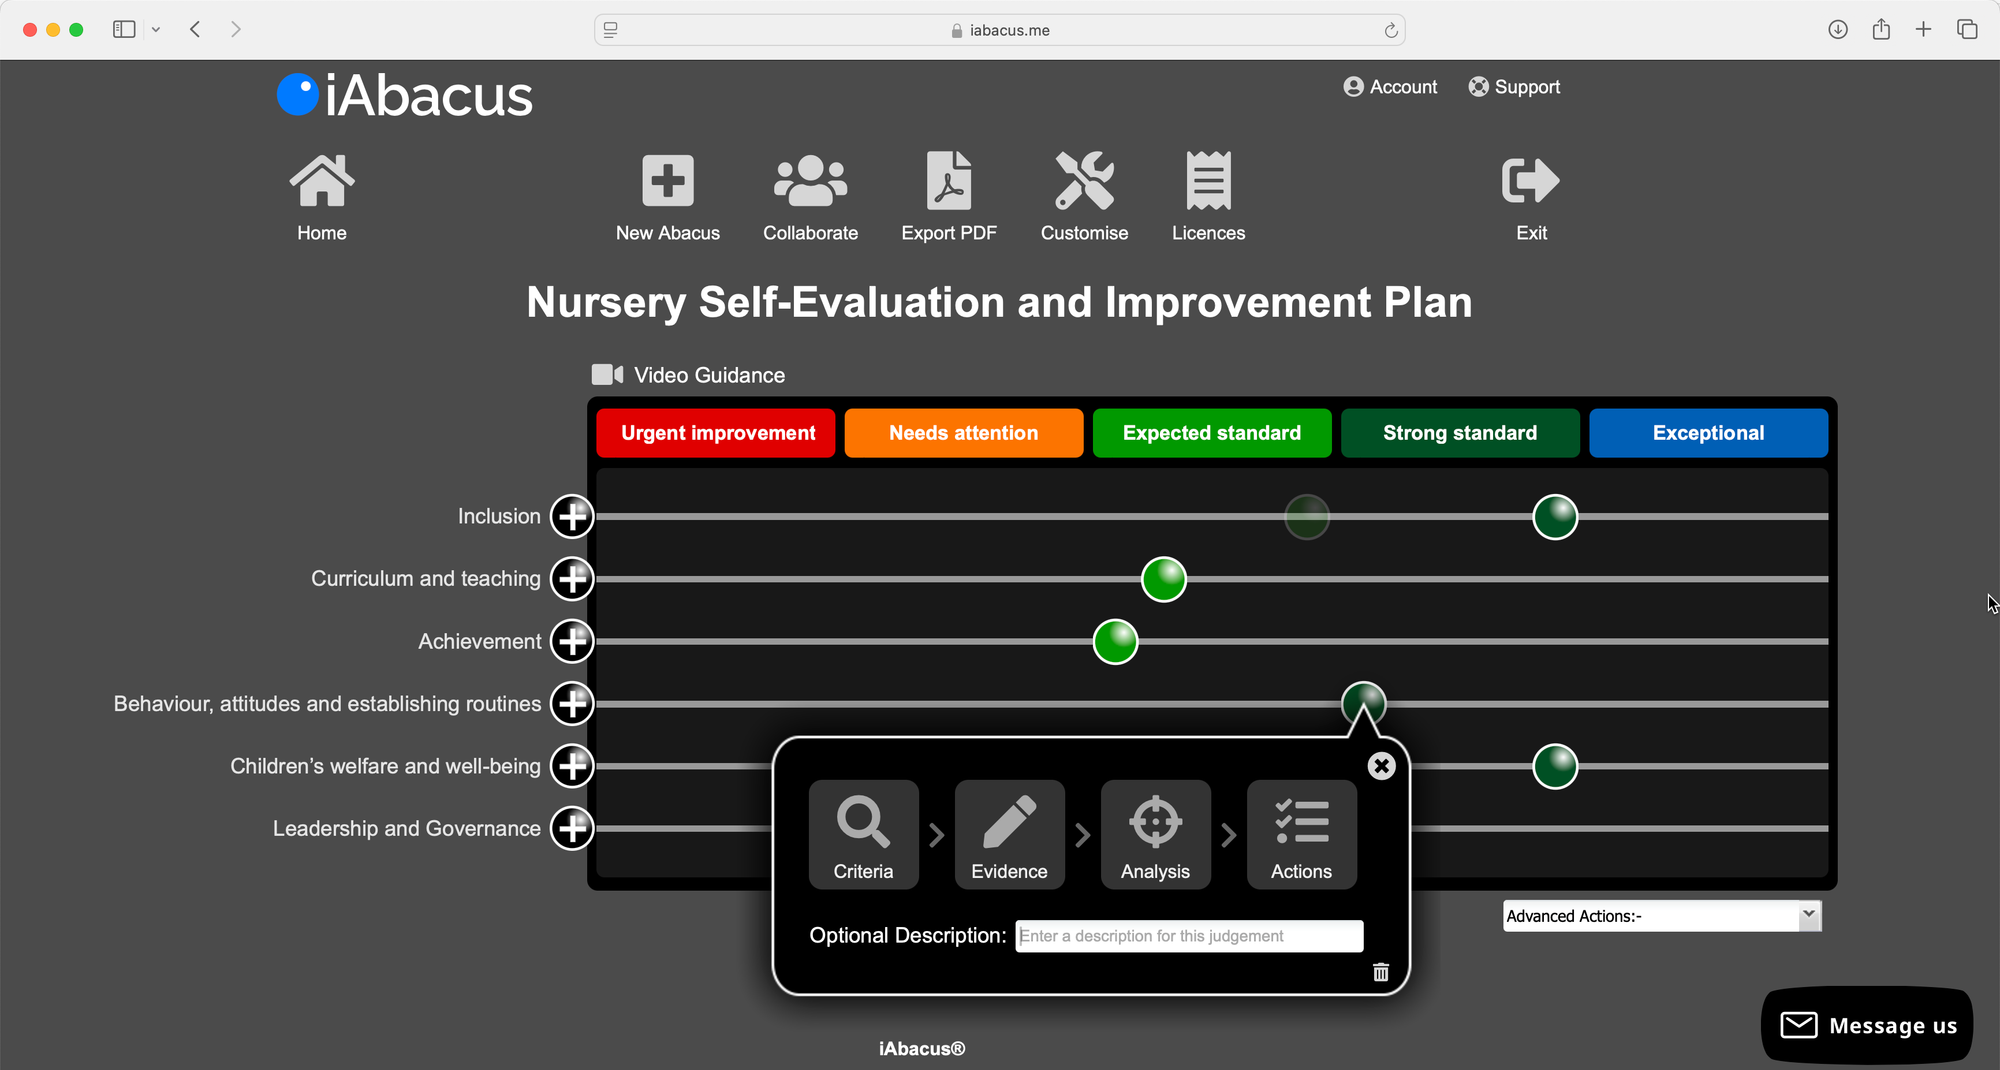
Over the last 25 years, working alongside school and nursery leaders, I’ve refined a four-step model that does just that. In iAbacus, we turn it into a visual process with sliding beads – but you can use the thinking behind it however you record your self-evaluation.
The four steps are:
- Judge
- Evidence
- Analyse
- Plan
Let’s walk through them.
1. Judge – start with your professional instinct
Most leaders actually do have a clear sense of where their nursery sits in each area of the framework. They might not have written it down yet, but it’s there – built from years of experience and daily observation.
So we start by honouring that.
Pick an area from the toolkit – for example, Curriculum and teaching or Inclusion. Before you dive into the wording, ask yourself:
- “If I had to place us somewhere on the spectrum from ‘to ‘exceptional’, where would I put us today?”
In iAbacus, you literally slide a bead to that point. On paper, you might mark a spot on a line. The important thing is: commit to a starting judgement.
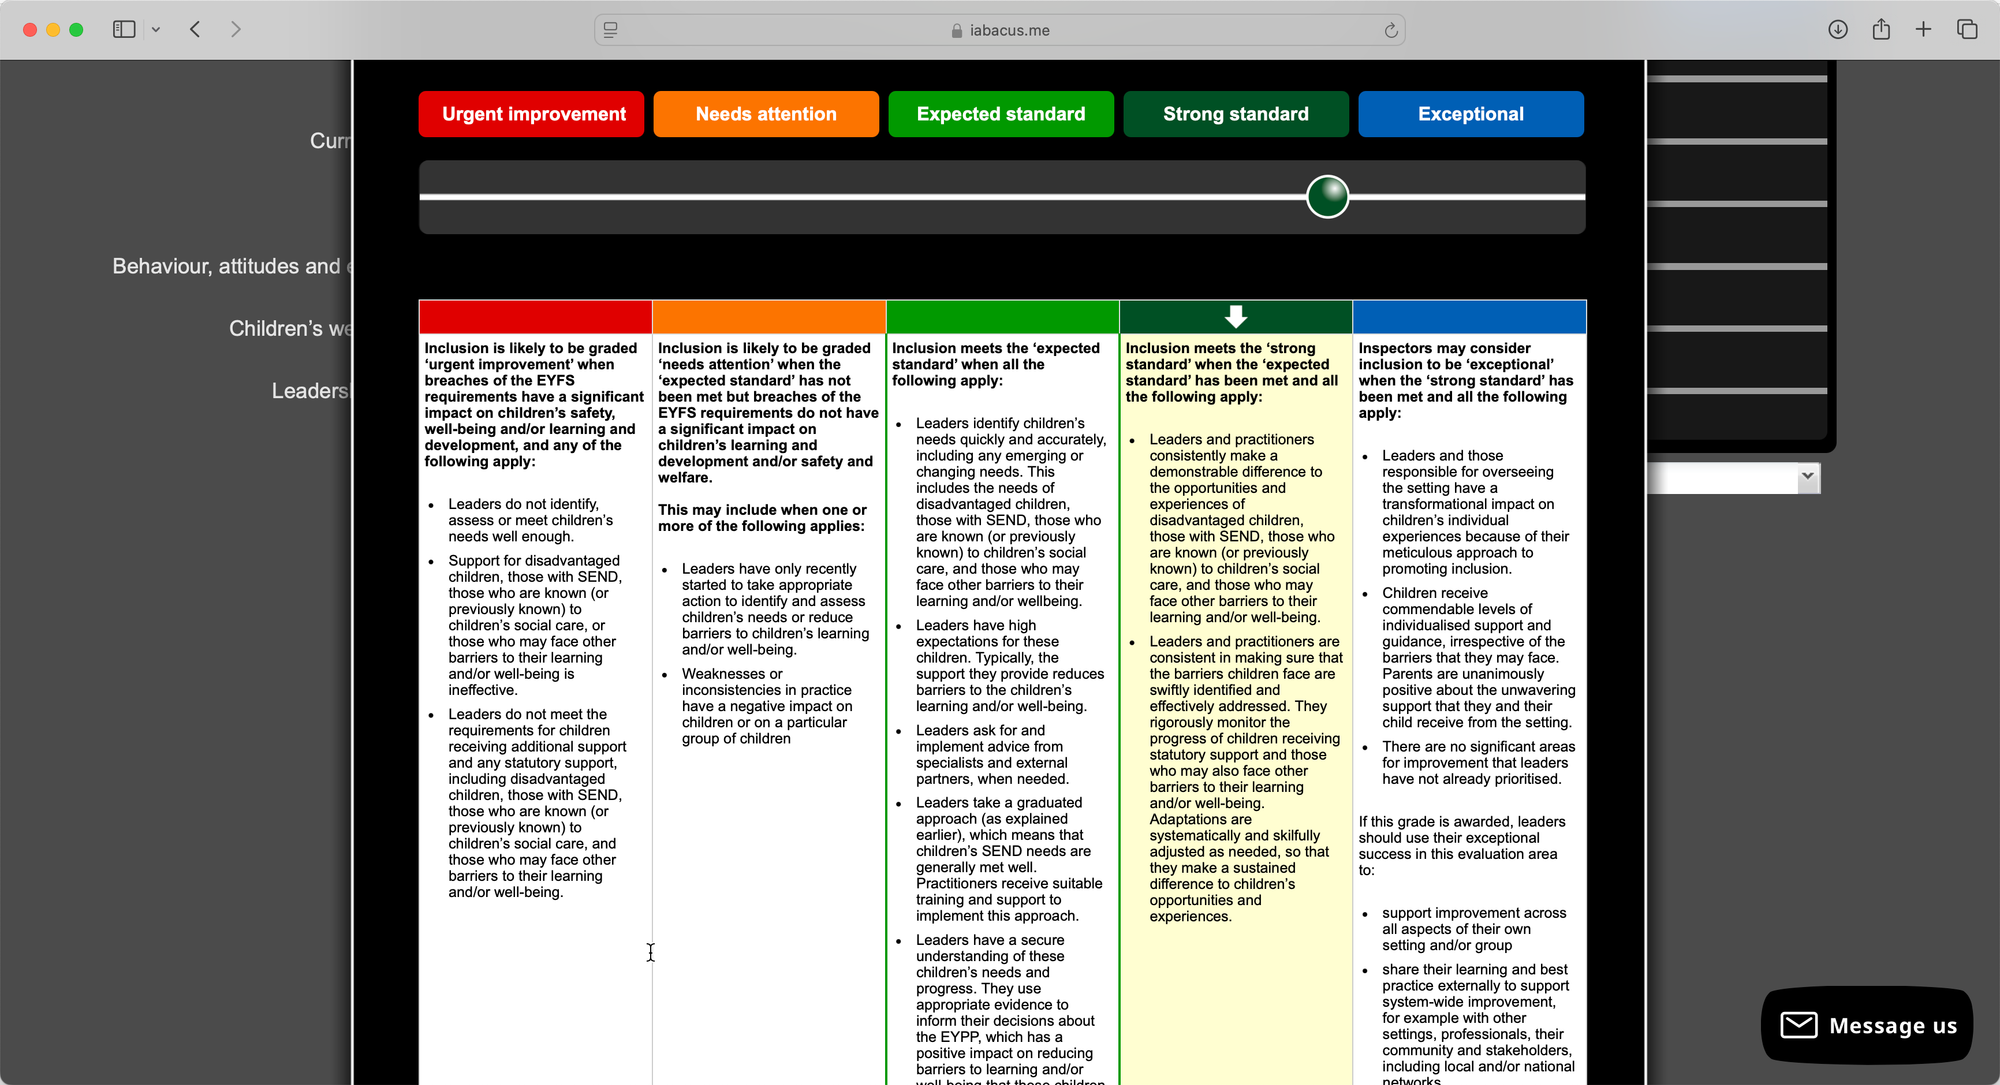
Then, and only then, you bring in the toolkit descriptors.
Read through the relevant criteria and check your instinct:
- Does the wording you’re reading confirm what you thought?
- Does it nudge you slightly up or down?
- Are there phrases that make you realise, “We’re stronger than I give us credit for here”?
Adjust your judgement if needed, but don’t lose sight of the fact that it’s your professional view. The toolkit is there to sharpen it, not replace it.
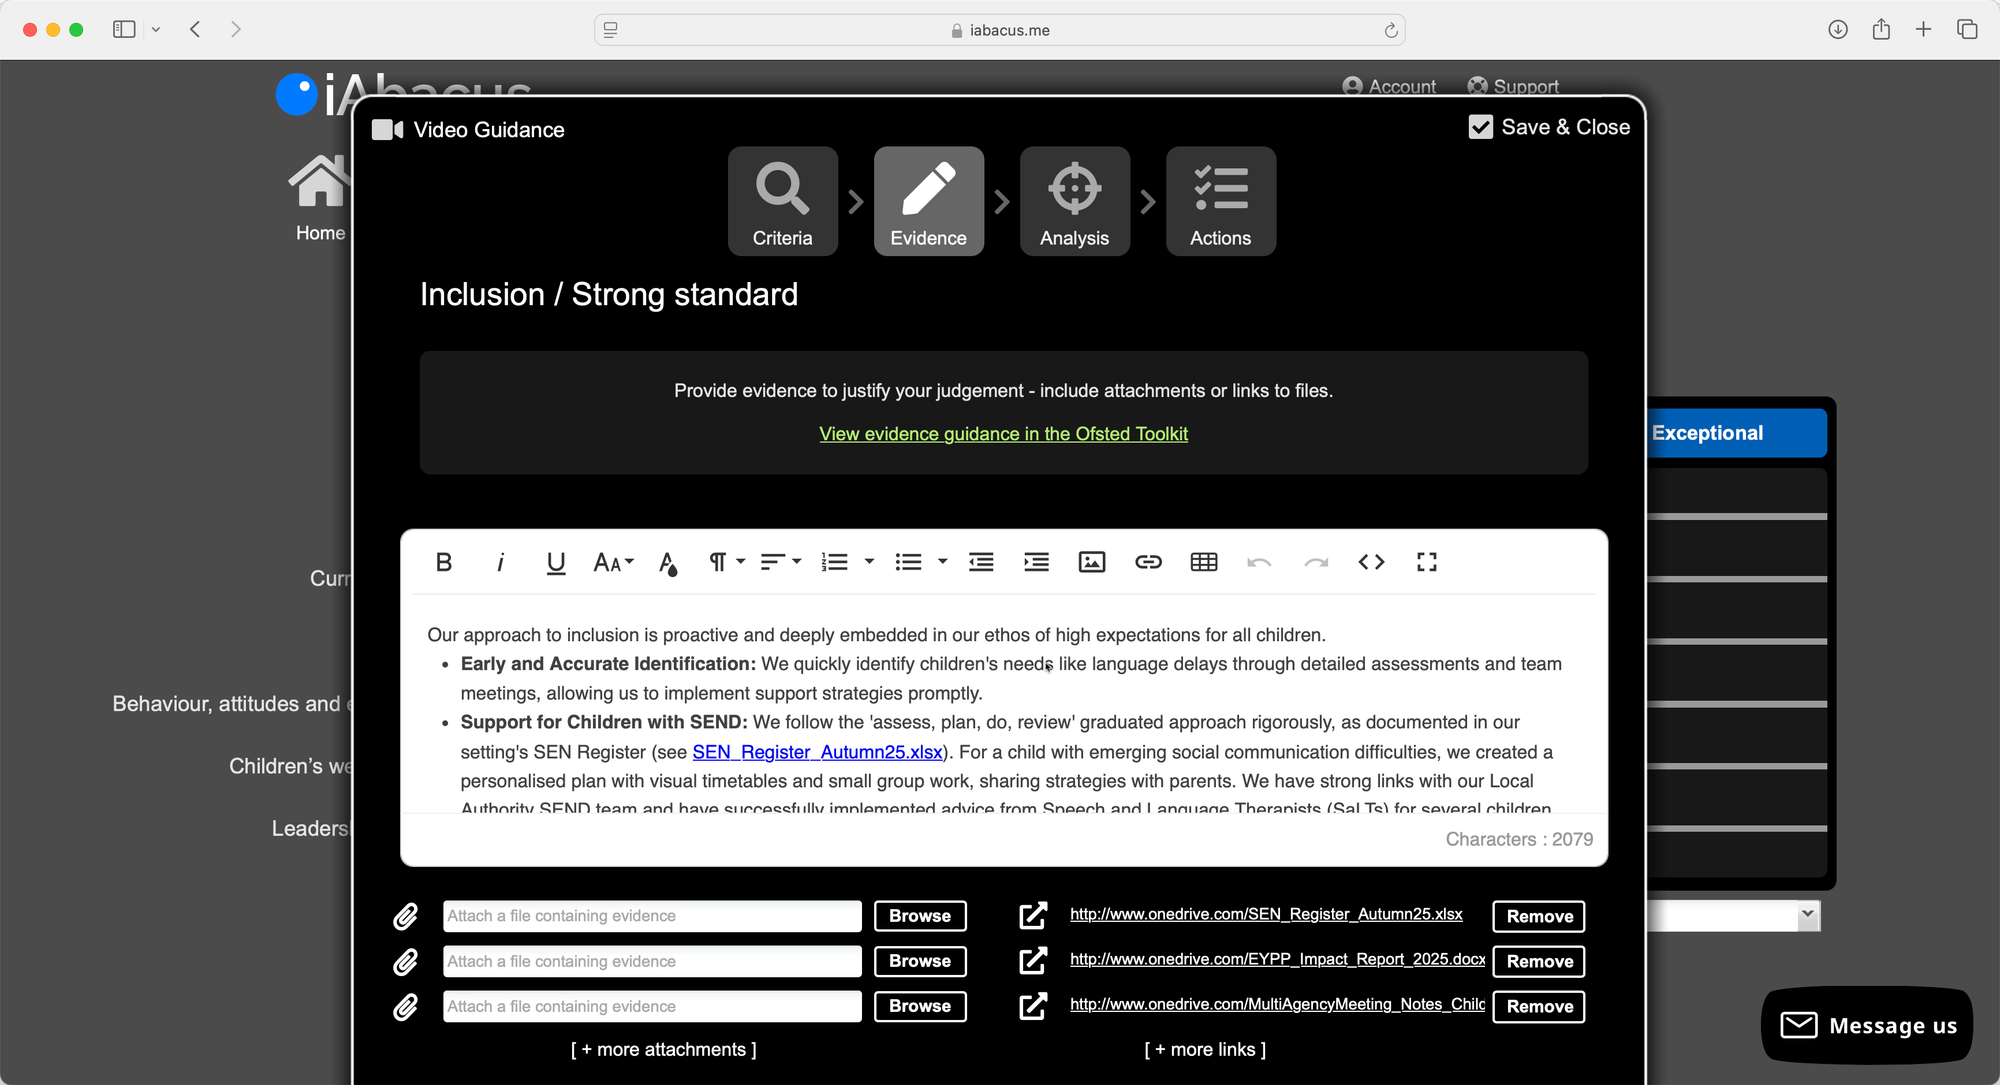
2. Evidence – tell the story behind the judgement
A judgement on its own isn’t enough. Inspectors, staff and governors will quite reasonably ask, “What makes you say that?”
Evidence doesn’t have to mean “more paperwork”. It can be:
- Brief, evaluative bullet points
- Parent feedback or surveys
- Observations from room leaders
- Data on progress and outcomes
- Photos, examples of children’s work, etc.
The key is to be concise and evaluative, not descriptive.
Instead of:
“We have regular CPD sessions.”
You might write:
“Half-termly CPD on communication and language has improved staff confidence and led to richer interactions at circle time (evidenced in observations X and Y).”
In iAbacus, you can paste in links or upload files directly under each bead. The effect is the same: anyone reading your evaluation can see, at a glance, why you’ve placed yourselves where you have.
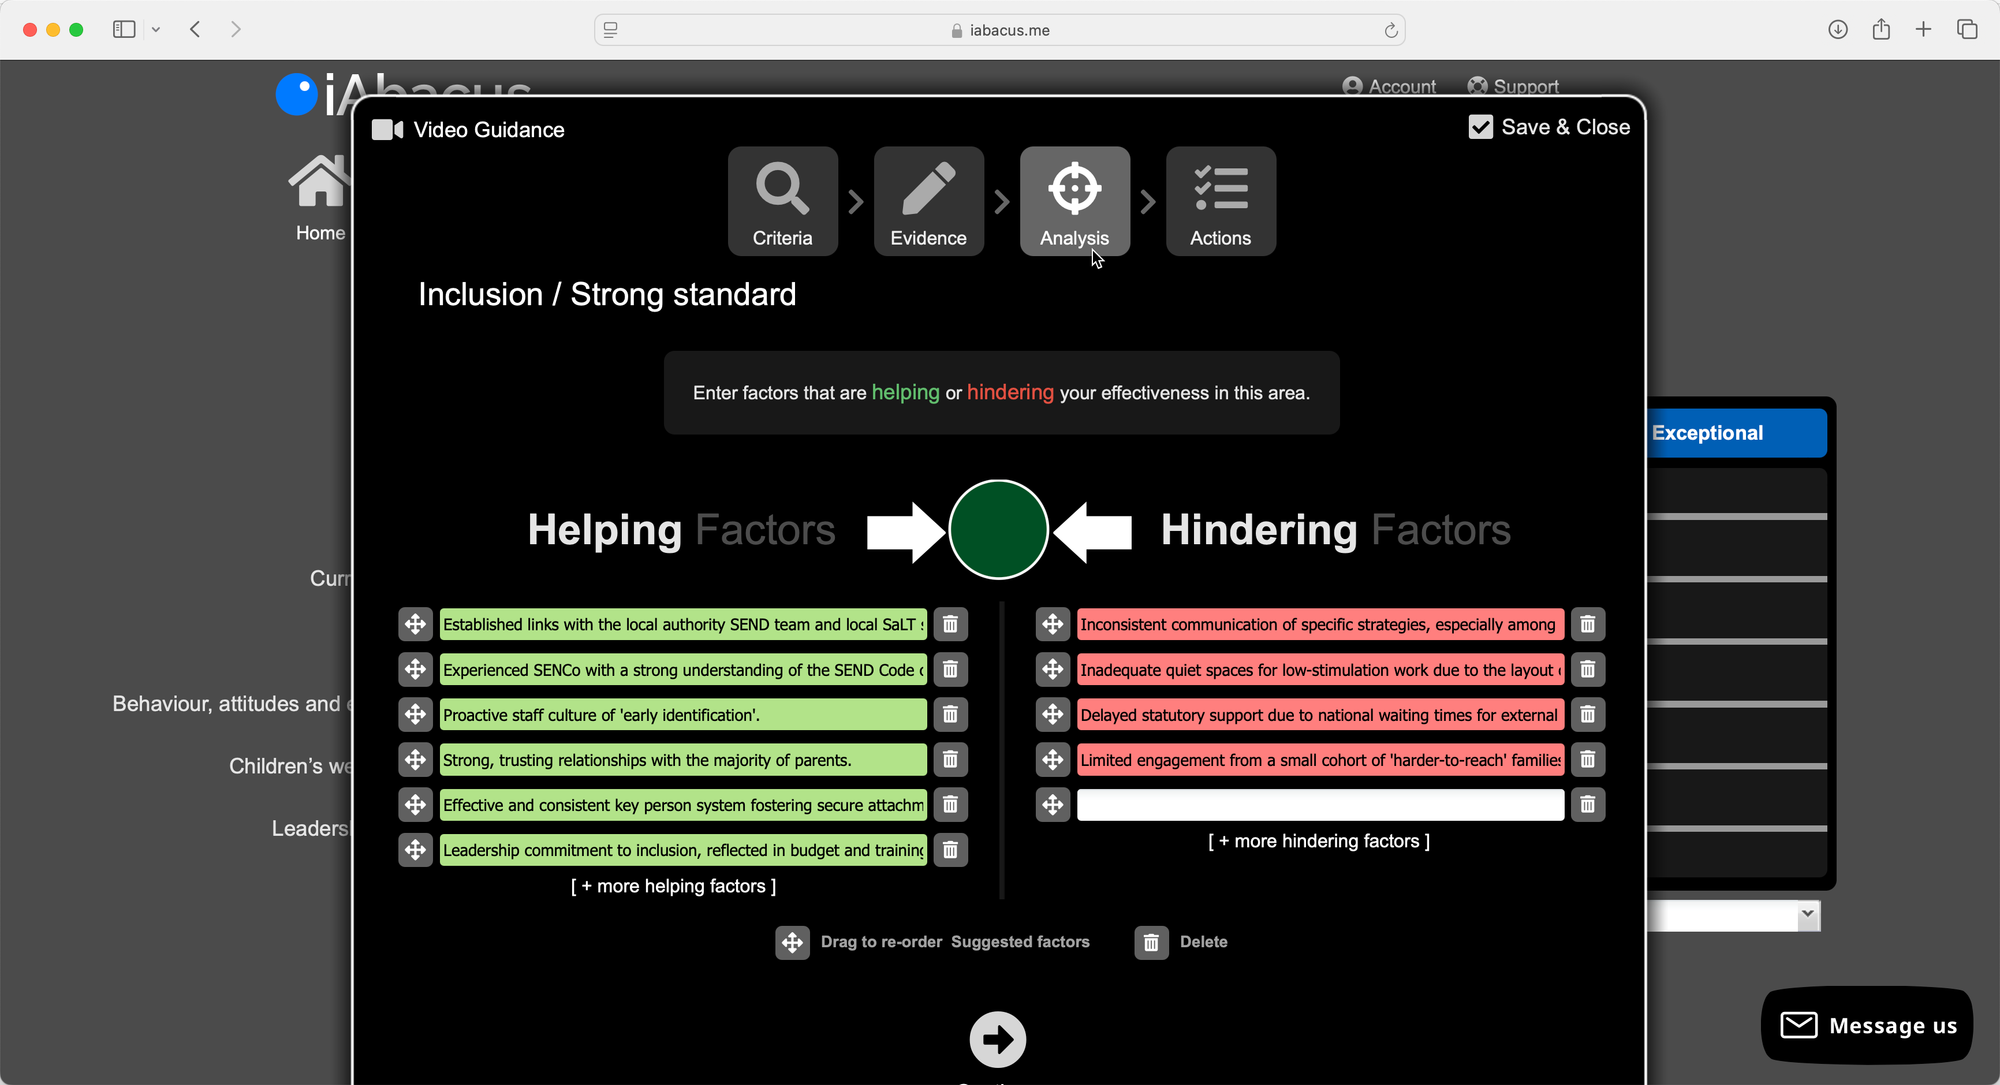
3. Analyse – what’s helping and what’s hindering?
This is the step that turns self-evaluation from a static description into a powerful leadership tool.
Ask two simple questions:
- Helping: What’s pushing us in the right direction here?
- People?
- Practices?
- Partnerships?
- Particular routines, approaches or resources?
- Hindering: What’s holding us back?
- Staffing constraints?
- Inconsistent practice between rooms?
- Gaps in training?
- Physical environment limitations?
List these on two sides of a page (or, in iAbacus, on the left and right of the analysis screen). Then prioritise:
- Which helping factors are having the biggest positive impact?
- Which hindering factors are the biggest barrier right now?
You won’t be able to work on everything at once. That’s normal. This step simply makes your reality visible and shared. It also stops improvement plans from being a random list of tasks: they are grounded in a clear diagnosis.
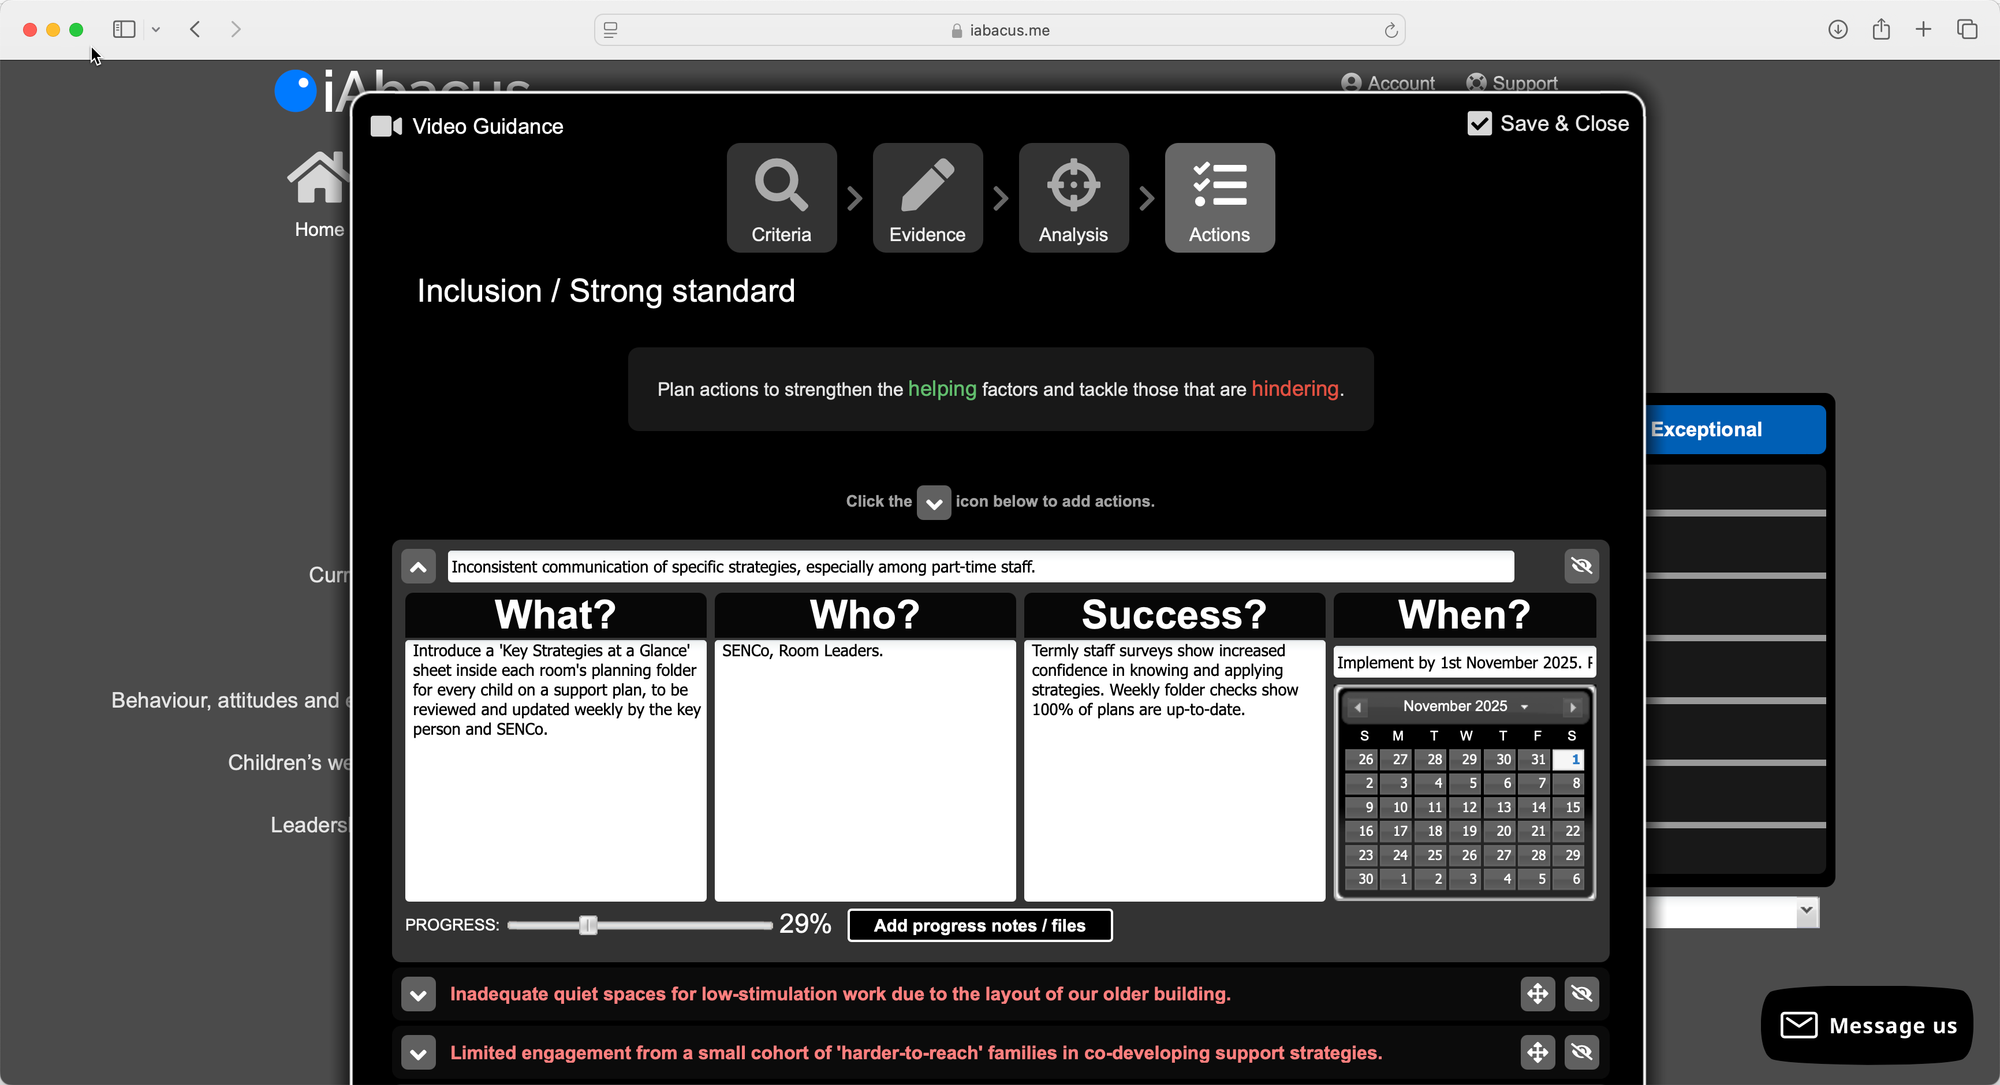
4. Plan – focus on the few actions that matter most
Once you’ve named the main helping and hindering factors, your plan almost writes itself.
For each priority factor, complete a simple planning strip:
- What exactly are we going to do?
- Who will lead or be responsible?
- What will success look like? (your success criteria)
- When will we review progress?
In iAbacus, this sits right underneath the factor on your screen. You can also slide a progress bar as you go and note evidence of impact.
The point is not to generate a huge, impressive-looking plan. It’s to create:
- A realistic set of actions your team can actually deliver
- A clear line of sight from judgement → evidence → analysis → action
When inspectors visit, they’re not just interested in what you’ve written. They’re interested in whether your staff recognise the priorities and can talk about the difference your actions are making.
This four-step model builds exactly that.
Making it sustainable (and inspection-ready)
The beauty of this approach is that it’s cyclical.
As you implement actions, you gather new evidence. Over time, you revisit your judgements, move them if appropriate, update your analysis and plan again. You’re not starting from scratch; you’re building a visible improvement journey.
When Ofsted call, you’re not feverishly writing a self-evaluation overnight. You already have one – live, honest and in daily use.
That’s what I believe nursery leaders deserve: a way of working with the toolkit that respects your time, your professionalism and the complexity of your setting.
If you’d like to see how this four-step model works in a live, visual tool (with the new 2025 toolkit built in), I’ve recorded a 10-minute walkthrough inside iAbacus.
You can watch it here:
Or, if you’d rather talk it through in the context of your own nursery, I’m always happy to have a short one-to-one conversation.
Book a slot on my calendar and we'll chat over Zoom or Teams.


